I received a LLBean catalog and browsed the swim suits. They are quite nice and a bit pricey for those of us with a sewing machine and a stash of stretch swimsuit fabric and a bit of elastic. Here are some links to help you along with this endeavor if you are so inclined.
How to Sew a REAL bra into Your Fave Swimsuit Pattern - The Sew ...
Adding Bust Support to a Swimsuit: Boning & Cups - Curvy Sewing ...
add bra cups to a shelf lined swimsuit - see kate sew
Bra to Bathing Suit - Tasha Delrae
Be Bold: How to Sew a Swimsuit You'll Really Love, Part One - Craftsy this one is FREE! Use our link first ok? Just incase you are so inclined to buy something while you are there!
Swimwear Basics | Seamwork Magazine
Sew Along Day 2: How to Sew on Swimsuit Fabric & Linings - Peek-a ...
How to Sew Elastic into Swimwear - Indie Sew look at the wonderful pictures!
Good luck! Be sure to send me pictures. No need to model...unless you want to!
Wednesday, May 31, 2017
Saturday, May 13, 2017
Show and Tell
Hey there! You found Albany ASG members sewn items. Sometimes you want to see what others are making for inspiration or motivation to get sewing! This is where you can see our failures and achievements! Come on! Get in on the fun of sharing! See contact info above.
Enjoy!
________________________________________
This time playing with new computer...
Vogue 1182

On the right is Silk Dupioni straight out of the Vogue Fashion Fabrics bag. On the left is what it looked like after I **gasp** washed it. I knew washing would change the hand of it, but if I didn't wash it then I would have worried about any drop of water that would hit it-and mar it. No bother, but I wanted you to SEE it, since I've only read what washing would do.

Lining up for cutting. I do some of my best work-on the floor. Ha ha. If you look closely on the left you will see remnants that I haven't cleaned up yet from previous on the floor cutting projects.

Here is a picture of the dress in the making of the pleats. Recently I read that I could have used some tricot interfacing on the wrong side here to hold the pleat. Next time. Yup, there are a lot of next time notes I need to make. I don't know if I will ever make this dress again, but if I do it is nice to have my challenges and fixes on the ready. This pattern doesn't lend easily to a FBA, so I used my best judgement on the nested cutting lines for the larger size and altered the side fronts a bit. I could have used a waist raising adjustment I think because when I wore it I felt like I needed to hike it up-although this could have been because I should have used a larger size on the hip area. ahem. Yes, I was actually considering not wearing the dress to the wedding because I couldn't sit! I wore a very tight slip that I bought RTW on a steep discount, without reason, since I have that nice black one I made. But, sometimes things just work out for the best. That tight slip enabled me to sit comfortably. Another item I bought without reason was the brown silk charmeuse lining from MOOD several months before when I was searching for the black silk lining for the jacket I made (and wore in the fashion show last November). This brown lining was a great price, that I knew I could find a use for it-someday. That someday came and I was very grateful I had it. Before I cut into the pattern, I evaluated and even started a forward shoulder adjustment-one I normally make. I decided this was completely unnecessary and a waste of time because the collar pieces completely cover it up. I made some tucks in the pattern along the neckline, but curiously I did not to need to mirror those adjustments on the collar. hmm. Note to self: next time make sure to interface the whole dress. I forgot this step and think the finished garment would have elevated a notch.

The big reveal:

Hey Sallye, I wore nude shoes just like you told me!
I also made a cute little clutch in the hour before we were to leave. Too bad I didn't get a picture of me in the dress with the clutch. :( My husband was quick to tell people that I made my dress. I posted a picture on Facebook. One of the ladies at work said she saw it and said the dress was nice. Another day came by and this same lady says she didn't realize that I made the dress, and complemented me on the custom made dress! Aww!
The Fabric Education event was a great success. Thank you Kathy and everyone for putting that together.
I left with lots of bottom weights and some other special pieces.
The above posted by Bonny D. on May 31, 2017.
_____________________________________________
testing the new computer>>>


ahhh it worked! Praise God!
Some recent sewing by yours truly:
The husband received a vest with the crest of the Fire Department already embroidered, for his participation in the Fire Department last year. He asked me to embroider his name on it. The pic below is my Janome in action. I flipped the vest over the machine for full motion ability.


Despite my efforts, the design is a bit off kilter, but the recipient did not complain or notice.

Marc was ecstatic! Yea!

This is Vogue 1250, it was THE pattern to make a couple years ago. Haha. It took me a while to get to it. I wore this dress to the Fire Department dinner. I think it came out better than this pic shows. It is a very easy pattern, only 3 pattern pieces, one of which is the back facing. I made a top with the remainder ALREADY! The top from another pattern, has the same neckline treatment, but with long sleeves. I made a different dress, all that was left was the hemming and neckline finish. My daughter pretty much said it was too ugly to wear to the dinner, so I made this Vogue you see here. I'm going to finish it and let you girls be the judge...to be continued!

This is the slip I made last year and wore under the dress you see in photo above, I also made one in nude. I think it is a Butterick pattern. I skimped out when I got to the straps and used some slightly scratchy neckline bra elastic. It holds the slip up, but doesn't match the softness of the main fabric or other wider pink elastic.
Forgive me for cropping it-modesty rules!
Look Ma! I'm on the blog half naked!
I finally figured out about the sideways photos, you can right click as if you wanted to copy/paste, and there is a "rotate" button, click that and save with new name. Voila!

the above photos added for your viewing pleasure and laughter by Bonny D. on March 28, 2017.
...the most comfy pj pants!
another pair of pockets for the darling daughter...
I FINALLY finished my bed runner that I decided belonged on this bookshelf...
...this is a sleeve -on the dress- that I altered to be one piece - with a dart- because my fabric is plaid. More pics to come if it turns out! I also added 5/8" for extra neckline coverage. What can I say, I get cold!
Now some sewing by others!
Ann S. shared this via text (yes I take text, email me if you want my number)
Kathy K does her own thing, home!
Kathy K doesn't stop at the fabric, or yarn, or gourd arts...These are tiles that she uses alcohol paints to make these awesome designs. I was floored!
I apologize for the sideways pictures, sometimes I just can't figure things out.
Posted by Bonny D. on February 6, 2017.
-------------------------------------------------------
A note from Joyce:
I recently took a 2 l/2 day quilting class at KC Framing.
We were given a 20% discount for items bought during the class.
There was plenty of space. We each had a table for ourselves. Help was there if you needed it.
We worked on our own projects.
KC Framing has a good selection of fabrics.
They also have a long arm and do quilting.
The two girls who run the shop are very helpful and I would recommend it to anyone. I would go back for another class.
______________________________
Lucy provided the following pictures from
GNG Nov. 2016 mtg. Christmas ideas and Show and Share
posted by Bonny D. on January 7, 2017
_______________________________________________
Lucy provided the following pictures from a GG meeting and LINK click here to wonderful pictures from the April Expo.


Posted by Bonny D on June 25, 2016
__________________________________
This link is from Lucy on the
_____________________________
From Kathy F: This is a Sara Lawson bag. From her book Windy City Bags. I took her class Building Better Bags Interfacing and Structure on Craftsy. Excellent class! I would recommend this class for anyone that makes bags or would like to learn how to make bags!
Posted by Bonny D on April 5, 2016
______________________________
Kathy K. stopped by my work the other day and showed me this beautiful quilt she is gifting.

I made the quilt below many moons ago for a friend. It needed some repairs before I can replace it. I called it "quick and dirty" sewing. As I stood next to it on the bed, the repairs aren't even noticed because of the busy print. My friend was impressed that I still had some of the original fabric AND that I knew where it was. That is what my sewing friends and I call a "quilters secret"!


Posted by Bonny D on January 23, 2016
_____________________________________________
My recent sewing...
This is a gift that I proped on my mantel to see how it would look. I used a template from a free tutorial on the little stuffed trees. I added the little balls for extra bling. It made a nice little presentation in the box.


Minky with woven flannel, simple blanket but so nice and cuddly!


Posted by Bonny D on January 3, 2016
_________________________________________________
A little road trip with Kathy K lead us to the Adirondack Quilt Store in Glens Falls. I left with some fun prints to make fast and easy blankets for my cousins (shh it's for Christmas!) and a fun pattern. The prices were reasonable, and they had lots to choose from.


Posted by Bonny D on October 31, 2015
_________________________________________________________________
This is my newest top Simplicity 1280, made with Vogue Fabrics.


Will my jeans be ready for the fashion show????????
Posted by Bonny D on October 27, 2015
______________________________________________________________
I finished McCalls 6400 this month. I made it in the Sawyer Brook fabric I had left over from a dress I made. The top was super easy to make, just ONE piece! I used my cover stitch machine for hemming the sleeves and bottom hem and neckline. I used a stretch stitch that is included in my Janome for seams. The top is a bit weird to wear, I found myself fiddling with it a lot. I like it however and will wear it. The only alteration I made was to cut the front neckline piece lower by one inch.


The product description starts at the bottom right in the picture:
1x Fringe Foot - a good tool for creating 3D decoration, stereoscopic flower and tassel effect.
1x Cording Foot
1x Braiding Foot
1x Pearl Piping Cording Foot
1x 9 Grooves Pintuck Foot
1x 7 Grove Pintuck Foot
1x Concealed ZIP Foot
1x 5 Hole Cording Foot
1x 6mm Round Rolled Hem Foot - a good tool for handling those failed overlock and creating perfect rolled hem.
1x Teflon Snap on foot
1x Open Toe Embroidery Foot
1x Open Toe Foot
1x Cording Foot
1x Snap on 1/4" Metal Patchwork Quilting Foot
1x Straight Stitch Foot
1x 1/4 Piecing Foot Guide
1x Edge Stitch Foot
1x Satin Stitch Foot - a good tool for dense stitch and applique sewing.
1x 7 Hole Cording Foot
1x Patchwork Edge Joining Stitch Foot
1x Guide Stitch Foot
1x Blind Hem Foot
1x Gathering / Welting Foot - a good tool for flouncing and ruffling sewing (only suitable for thin fabric).
1x 3mm Rolled Hem Foot
1x 6mm Rolled Hem Foot
1x 3mm Round Rolled Hem Foot
1x Roller Foot
1x Embroidery Darning Foot - a good tool for sewing embroidery and darning on heavy fabric.
1x Adjustable Bias Binder Foot -The adjustable range of the adjustable bias binder foot is from 5mm to 20mm.
1x Quilting Darning Embroidery Foot
1x Adjustable Zip Foot
1x Knit Foot
You can drool if you want, or go get your own, just make sure to use the Amazon link that's located top right of this screen! Amazon is more than just BOOKS!
posted and written by Bonny D on July 24.
_________________________________________________
I found this photo in my emails...yes it has been there a long time. Sometimes I miss an email because of all the nonsense that fills it up! My apologies!
Lucy made her Granddaughter a beautiful Frozen dress! Adorable!

and a note from Pat
Hi Ladies,
Last Fall someone loaned a wallet, attached pictures, to the Garment Group to use at the 2014 luncheon. The Garment Group has been trying to return it ever since last Fall's luncheon. If this wallet belongs to you, please email me so that I may return it. Thank you.
Pat


posted by Bonny D on July 1, 2015
______________________________________________________________________
I finally sewed something besides hemming my RTW pants! 
This is Butterick 5997 View A with B sleeve, using fabric from Vogue Fabrics. The fabric is a bit sheer, so a tank underneath is mandatory modesty protection! This took a while to complete, mostly because I was super lazy and didn't feel like finishing it. I am glad I did, this is a super stylish blouse!

At the last Joann sale on patterns I picked up these:

Top left is a super unstructured blouse. I suppose I can add a waist dart...or like it as is. Two woven dress patterns. I really want to get a woven dress done this year. The bottom left is a knit button down top. I have had one from RTW that I just loved, and wanted to recreate that comfy feeling!
I also wanted to finally get a pair of wearable pants. I made very wide leg pants a couple years ago. I don't think they are flattering on me, and the fabric is hard to match for a top because the legs are so wide and the coloring with stripe. So...I let my fingers do the walking to the Palmer Pletsch website, and browsed the classes near by in PA. Then I found a list of PP certified teachers...where is where I found Karlie from SewShouldYou.com. I did a quick email to her asking if she would be willing to help me fit some pants. She has sewing classes for pant fit, but because of my location she allowed me to arrange just one day. She is about 2+1/2 hours away. I went this past Monday! Karlie has an awesome sewing studio, complete with several iron stations and tables large enough for a work area and your machine. Karlie was wonderful and tissue fitted me with a new pant pattern I already prepared while watching the pant videos from PP at home. After some changes, I cut some fabric and she made some more adjustments. I pretty much just have to get in my sewing room and start sewing! Stay tuned for those pictures. I also brought with me some muslins that I have labored over and gave me advice about those too. I truly had a wonderful day, got exactly the help I needed and a boost of confidence to sew something! All at a reasonable price. I look forward to seeing her again. Maybe for that woven dress??? If you are interested please contact Karlie!
posted by Bonny on May 21, 2015
__________________________________________________
This is the Sew Together Bag. I made it in a class I took at The Ruby Scissors in Clifton Park. The bag features three zippered pockets in addition to four un-zippered sections. It is great to use as a travel bag, sewing bag you name it. Change up the fabrics and it could be used for anyone. It is fun to play with fabrics and zipper colors.


The class ran from 10-5 and was a lot of fun. Jessica who owns The Ruby Scissors is a great teacher. She gave us plenty of hints to help us along the way.
I am keeping this one for myself, but I have at least two more to make. One for my daughter and one for my niece.
Written and submitted by Kathy F
Posted by Bonny D on April 14, 2015
________________________________________
I knew was stressing about the holidays, just like everyone else, but when I was all done with Christmas sewing I realized I really had covered a lot of ground! (Just wish I'd sew for myself as much as I sew for "the kids".
For the new granddaughter I had to uphold family tradition and make her a stocking. Her Mom and Dad had stockings made by me, and now she needed one. Using a dark red cotton velveteen for the body, I cross stitched a cuff for the top, and it is lined with a Christmas fabric. In addition to the stocking she received one of those knotted fleece blankets as well. (Pic of pink and gray blanket.) But I guess that isn't really sewing, that was just cutting and knot tying.


Then for granddaughter #2 I made her a princess pillow (at her request) and an art pencil roll (picture of purple and green). She picked out the princess fabric (Elsa and Anna, who else?) while I was visiting Maryland in October. The pencil roll is made out of a wool blend felt, which I discovered is so much nicer to work with than the poly/nylon felt that you think of since that is predominantly carried at Joann's.


On to grandson #1 who had asked for a new fleece blanket that was bigger than the one he had. They are Baltimore Ravens fans but my grandson also likes the Seattle Seahawks. So I made a reversible blanket with both teams and he was thrilled! I sewed this one by serging the edges together.

My daughter then asked me to make a purse made like one her friends had made. The pattern is called the Butterfly purse and while on a trip to Maryland we went shopping for fabric. She loves to cook and bake and had put together a booklet of her family's favorite recipes and called it "Streett Eats". After seeing the apron made by Marie Smith where she included her grandmother's tomato soup recipe on the front, I decided to use "Streett Eats" and have it embroidered on a piece of white fabric and then attached it to the front of the apron. I was lucky and found fabric that my gut said she'd love - it has a kind of retro print to it and the almost identical colors of her kitchen. My gut was right....she loved it!


I enjoyed the sewing but really must start earlier in the year. My procrastination skills were highly tuned this year and I did all of this sewing in the month of December, and I still work a full-time job. Which tells me that I really do have the time that I should be putting into sewing for myself instead of making excuses!
Sallye Romagna
Well Done Sallye! I know all about procrastination...
finally posted due to computer cooperation! by Bonny D on February 16, 2015
________________________________________________________________________________
Here is some of my activity...
First up is two slips I made, to make me feel more covered when I wear an unlined dress. AND now I can feel confident NOT making a lined dress! Haha. I believe this is Gerties Butterick pattern using 2 way stretch fabric and stretch lace. I love the black and pink and the beige is just right for those lighter color dresses.


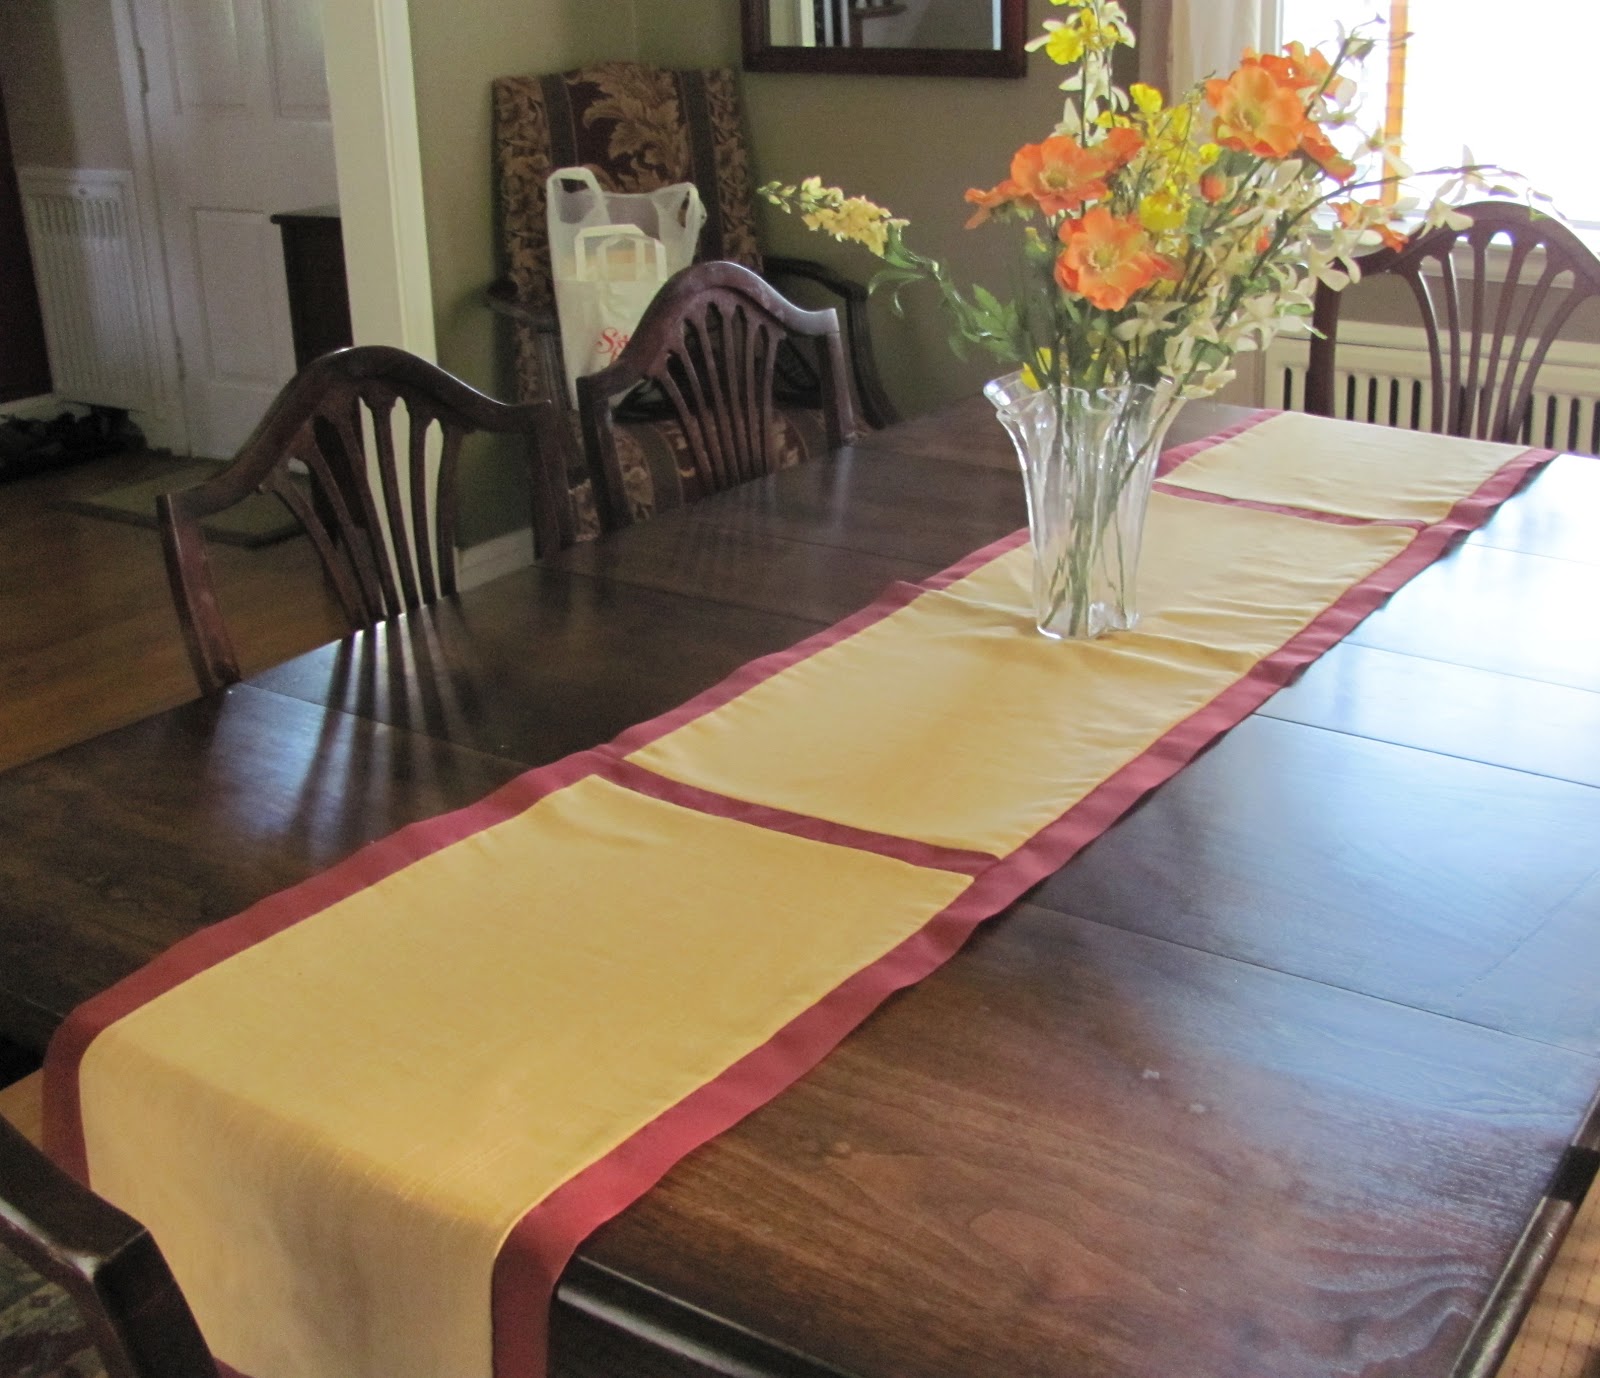
 This tablerunner was gifted to me, and made by my buddy and ASG Albany member Kathy K! Thank you again! I had to wash it because I USED it. It washed just fine!

Because Kathy K made me the above runner....I felt I must reciprocate! This is a Free Craftsy pattern! It was easy. I loved it so much it was hard to gift it. I have plenty of fabric left to make another...but will I?
 I made this for a special boy. Braided the edges of this double fleece blanket.
 AHHH, finally my quilt all done and quilted! I brought it to Pattys in Glens Falls, now know as Ruby Slippers? It took several LOONNNGGG weeks, but it is beautiful, once I binded the edges, I put it right to use, since this ones for me. One complaint though, the quilting design is going the wrong direction in my humble opinion. I need to be more intent on my intentions!
 Another little gift for a special boy. Fleece face/neck/head warmer thingamagig. Theres a name for these but I can't spell it! I made a few more with and without the stretch fold over elastic on eye opening and neck edge. Ahh, today is the perfect day to use it since its 11 degrees today.


pics and text and posted by Bonny D on February 16, 2015
ps: is my last pic half green? I loaded it twice, looks fine on this edit page but looks half green
when I view blog like the world does. hmmm. oh darn computers!
________________________________________________________________________________
Here is some of my activity...
First up is two slips I made, to make me feel more covered when I wear an unlined dress. AND now I can feel confident NOT making a lined dress! Haha. I believe this is Gerties Butterick pattern using 2 way stretch fabric and stretch lace. I love the black and pink and the beige is just right for those lighter color dresses.
Some of my Christmas sewing...
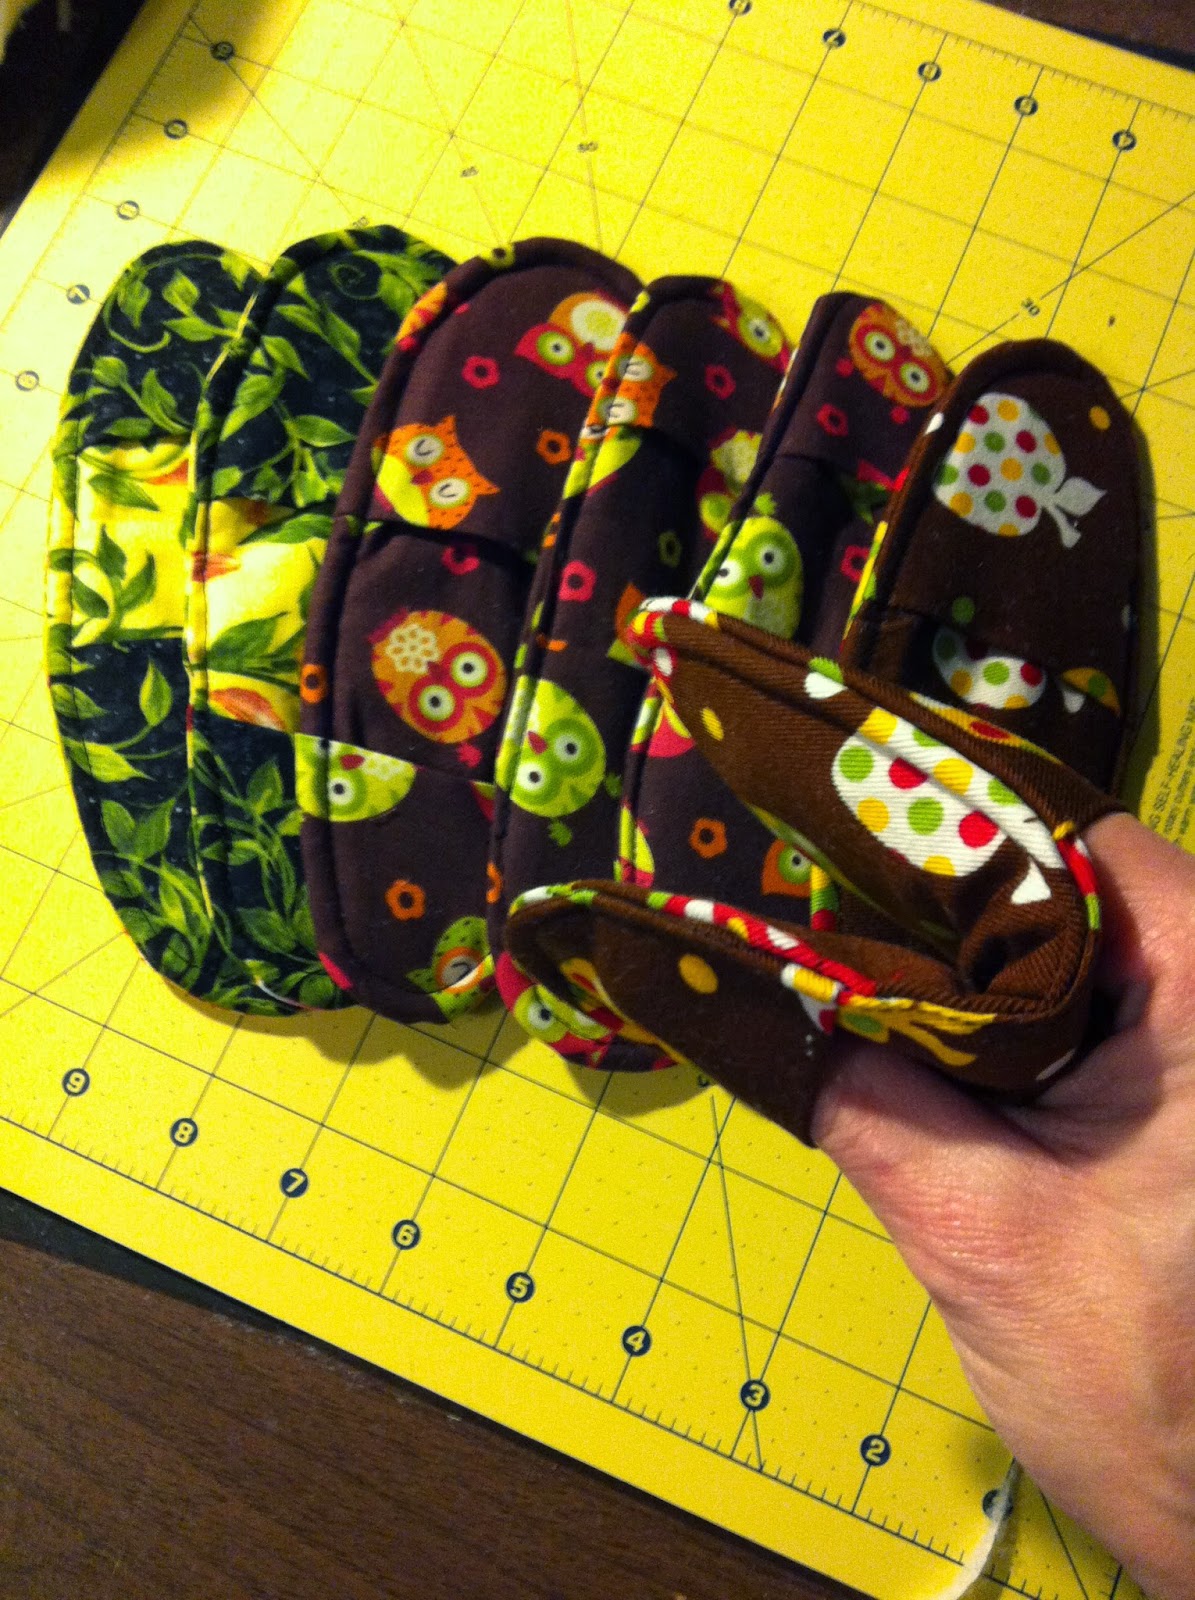
First up is little itty bitty finger potholders. Free patterns can be found online. These work best taking lids off of hot pots, a bit tricky using them to take out cookie sheets...but I do!
Here to end my pics is the dress I made with fabric I bought super cheap from the back corner of Sawyer fabrics from our bus trip. Yeah, you may recognize the dress since I wore it to the Annual meeting or because I have made this pattern before!
I really tried to make a different pattern from Gertie Buttericks line. It was asymetrical and had buttons down one side...(Kathy F may remember me looking at it at Joanns)...but Gertie made this dress superhard to make a FBA on it. I tried, it was a disaster and gave up. I put it aside to collect dust while I move on to other things like those darn pants? No, I'm making a nonfitted dressy top.
pics and text and posted by Bonny D on February 16, 2015
ps: is my last pic half green? I loaded it twice, looks fine on this edit page but looks half green
when I view blog like the world does. hmmm. oh darn computers!
________________________________________________________________________________
Here is my new 1955 Kenmore, a gift from a customer! It wasn't sewing when I got it, but with some lint removing and oiling lovin, it purrs loudly and sews! It came with this beautiful cabinet, where the machine tucks inside and the cabinet sides come up over it nice and tidy. It also has a matching chair, all solid wood and beautiful. Under the seat of the chair it hides a tiny drawer, that held bobbins.


Here is more items from the bag of goodies. Wooden and Styrofoam spools, old eyelets, lots of old thread, and old buttons and zips.

I am just thrilled that it runs. If I get my challenge done and my dress done...I hope to make an apron on the machine. My customer gave me a box that has a apron panel of fabric. Wish me time! Wish me luck!
Here is a customized request from a coworker...to put a name on a purchased lunch bag. I took it apart to do it, then forgot to move the inside lining away from the field of embroidery! At least the foam insulator was out of the way.

Written and posted by Bonny D on October 4, 2014
__________________________________________________
This pattern is tops! New Look 6977


Please don't look at my hair...apparently I didn't! I did a PatternReview.com on it.
Pattern Description:
Official description: New Look Just 4 Knits sewing pattern. Misses' top, pull-on full & slim skirts and pull-on pants. please add My description!: top with front gathering and cap sleeve.
Pattern Sizing:
US 6-16 for bust 30.5" to 38"
for waist 23" to 30"
I made a size 14, and ended up a bit too big in the shoulder area, but a smidgen too small at the back hip. and my hips are smaller than the patterns' 36".
Did it look like the photo/drawing on the pattern envelope once you were done sewing with it?
Yes
Were the instructions easy to follow?
Yes
What did you particularly like or dislike about the pattern?
Length of top, I think it needs more. There is a slight pooling on center back, like a drape. Pulling up the shoulder seam helped this a bit, but will adjust back pattern for next top. Armhole is a bit low, and shows bra band.
I love how easy it was to put together. The front gathering is just what I was looking for to kinda copy a favorite RTW. I used clear elastic for this gathering and it is not itchy or irritating, as it doesn't touch the skin. No sleeve caps to ease in? Yeah!! Once the shoulder seam was adjusted it was the perfect neckline height. I love how the binding has you apply it to outside of fashion fabric then gives option of topstitching. Which I did, and looks like I bought it. I used my edgestitch foot and most left needle setting.
Fabric Used:
Some kind of poly cotton lycra knit (I think!) I made a dress of it a while back. Since trying this pattern for the first time, I sacrificed my remainder piece for this top. This was a 2 way stretch or four way? It stretched up and down and side to side, but not in equal amounts.
Pattern alterations or any design changes you made:
I added 1.5 inches or so to the bottom hem. After sleeve was serged but before the binding was on the neckline: I took a wedge out of the seam on sleeve at shoulder to raise it up some. This reduced the neckline binding. So I had to guess by measuring the original pattern piece and my final garment to find a proper binding length. I figured the binding was about 2 inches smaller from the pattern pieces, so I made my binding my new neckline length reduced by two inches. However, I sewed the center back seam of this binding 5/8, it was supposed to be 3/8. I left it, and it was fine. By doing this it really helped the back look much better, almost no drape. I did not take a ity bitty tiny dart in neckline binding in middle at gathering as instructions said. It's fine.
I twin needled my sleeve and bottom hems. No skipped stitches as my coverstitch has been doing lately. (I got some new coverstitch needles to replace my *gasp* regular ballpoint needles to see if that helps)
Would you sew it again? Would you recommend it to others?
This is a great pattern, I'm not much in for the other views, since I don't really ever never ever wear skirts, or pull on pants (outside the house). I'm definitely going to make another top, I have the fabric from another dress waiting for me.
Conclusion: Simple easy summer top! Go for it.
Posted and submitted by Bonny D on August 25, 2014
________________
Submitted by Kathy F
These are pictures from the Library display! Available to see in person at the Moe Road Clifton Park Library until end of August.


Posted by Bonny D on August 6, 2014
________________________________________
Submitted by Ann S


I reviewed the jacket on PR. Cutting Line Designs A New Dimension jacket View A. Cotton Sateen from Sawyer Brook Distinctive Fabrics.
The shell is CLD Hearts A'Flutter and the pants are CLD My Swing Set - both in green linen from Ginny's Fine Fabrics in Minnesota.
Jewelry (which you cant see very well) custom made by my daughter Erin!
Bonny's note: See Ann's review on PatternReview.com by clicking her picture of above outfit on left of this page!
__________________________________
These are made from the Shelley pattern by Beverly Johnson, pink one is size 32E. The fit on this pink one is not ideal, however I must admit, I traced the wrong line on the cradle piece. The straps look better than the green one but I thought I made them the same way. The green straps are bunching up while worn and are a bit uncomfortable. Again, however...on my attempt to fix some side wrinkling I cut into the back piece and so the straps set further apart on my back. The straps don't come off shoulder though.

A complaint I have on this pattern, where the straps attach to the top of the side bar piece, it doesn't seem to fit right. Perhaps its the sewist? I must admit...see I'm so honest...that I did attach these green straps wrong end to front. The pattern piece is tapered on one end and not on the other. The tapered end is to attach to elastic on back. Oh well. I still made it work.

Submitted and posted by Bonny D on August 6, 2014
_______________________________________
Submitted by Ellen Y
These are items that I recently had for sale at the Vanguard ShowHouse
Boutique. The jacket below sold - it was my favorite - a very simple style
done with a hand screened linen fabric that I had the luck to find in a local
sewer’s inventory.

I barely had enough of
this interesting fabric to make this little short sleeved jacket. The button is
from my stash of buttons purchased at Knights on Osborne Rd. (It was
yellow - I colored it green with a permanent marker)
Oh how I wish I had made Roland an offer to buy his buttons when he closed
the store!

The jacket below was made from a find that I had in my stash.

This vest was supposed to be a jacket but I just couldn’t figure out how to
match the chevron print for the sleeves - thus it became a vest.

I am getting very frustrated
because there is little or no place to buy quality fabric locally anymore. I am
aware that there are scads of on-line places but I really like to see and feel
the fabric.
Hopefully I will find
something on the upcoming June bus trip to inspire me. I like to design and make
simple garments and let the fabric make a statement.
____
Marilyn and son John standing in front of the silk fabric at The Fabric
Place (Michael's) in Baltimore, MD. on John's birthday 6/7/14. Michael gives
a 20% discount to ASG members!

Bonny's note on picture: I was there too, last year when I went for a class with Sarah Veblen. Sarah was so nice and she drove us here. I bought a few pieces, but not from the back room where some is over 100 a yard! This is definitely a stop if you are traveling in that area.
____
This one came from SPANDEX HOUSE. Yup, the same one you may have walked into in one of our NYC trips.
This is my least favorite because it didn't come with item numbers?? How would I order it? I need my original swatch request that is currently missing :( However I believe this one was free, ((you can get 10 free samples, then its one dollar for more)) and as you can see the swatches are quite large.

Sorry for the misaligned photo. This is from SPANDEX WORLD, another NYC hot spot for all things that stretch. I am showing you here one page of three that came. 30 samples max, but you pay here. For my 17 samples, I paid $15.75. These are nicely labeled to order!
I did find a soft powernet, but it was in nude, the "sister" was white but not as soft. I was hoping to dye the white one, but now I know its not as soft!


This comes from my favorite FabricDepotco.com, in TEXAS. This company sells their samples in little packets, just enough material to see the beautiful colors, weight, and stretch. They cost about 1 or 2 dollars each, free shipping on samples! This online store has everything you need to sew bras, exercise wear, dance/skating costumes.

This is another favorite. This is a subscription service about $60 a year. For each season and inbetween. they send me this book. On each page it has 6 samples in a particular colorway. On the left is a description of the fabric you are admiring. I order a lot from here. I only wish I sewed it all up! This service allows the recipients to order first! They put a public hold for a bit of time for you to get your book, drool then order. Vogue Fabrics has a cute theme in each book, this one is Garden Month, and previous ones on Chanel, cocktail recipes, famous writers, even architecture.


I was reminded today of this sheer fabric I bought with a matching opaque solid, still waiting for me. The swatches are below, the top left, and the bottom right are the ones I ordered. It's so pretty I really have to get going on it.

3 Posts by Bonny D, on June 16, 2014
_____________
Sallye submitted the following:


_____________________________________________
April Clifton Park Meeting: Button Bracelet show and tell!


Posted by Bonny D, April 7, 2014
____________________________________________________
Here is my new dress! Deadline met! With a day of sewing
time to spare, HA! This dress was made especially for the
Quaker Springs Annual Banquet. I think it came out
smashing! I purchased this slinky fabric in 2009 from Vogue
Fabrics. I have enough remaining for a little top, hmmm,
maybe, sleeves take up so much, maybe with no sleeves? This
is another McCall's 6282, view B, with my super sleeves that
I altered to be skinny and extra long


March 23, 2014
_______________________________________

I flew by the seat of pants and made tweaks to my "design"...much happier with this guy. Each elephant will have a different color scheme...that's the plan anyway! :-)))

This pic shows the colors of the baby quilt and I'm picking up the colors of the quilt for the "saddles" on the elephants.

Sallye
Posted by Bonny D on March 7, 2014
___________________________________
Scenes from Clifton Park Show and Tell...March 6, 2014


Posted by Bonny D on March 7, 2014
_____________________________________________________________


Mary F shows her luggage totes with zippered opening
Mona C holds her Christmas table runner
Mona C holds her Christmas table runner
Joanne M shows her luxurious pillow
Cathy S models her patchwork tote bag
Submitted by Phyllis
Posted by Bonny D on Feb 3, 2014
___________
Bonny D's Holiday sewing!


free pattern. Easy to find on the web, with video! Let me know if you need the link.


This one for my Mom! Whom some of you met! Fleece blanket double layered, braided edging.


Take a look at Tips and Techniques for how I made a bunch of much loved scarves from furry fabric.
Posted by Bonny D on Feb 3, 2014
____________________
I went on a road trip recently.


I brought with me some wires from home, hoping to find wires that had a shorter gore. Beverly helped me find them.

Beyond the black door is the class room. There is also an office area where Beverly took time from a class to size me for a pattern I purchased. I also purchased some soft to touch powernet.

Full range of patterns available and notions!
It was fun to see the store after ordering online and seeing the catalog. It is a little shop, with lots inside! Maybe someday I will return for a class. Meanwhile, stay tuned for
a bra a la Beverly!

posted and submitted by Bonny D October 1, 2013
____________________________
Some simple baby gifts for a member friends' grandbabies. the cloths are washcloths with cotton print on one side simply stitched down. The blankets are just two pieces of flannel, stitched right sides together, flipped out, then topstitched, then fancy stitched.

posted and submitted by Bonny D Oct 1, 2013
___________________
Marilyn is showing her "Best of Show" blue ribbon from the Saratoga County Fair for her black jacket.

SUBMITTED BY PHYLLIS
Posted by Bonny D 9/19/2013
______________________________________________
I made some little pants from some really cute prints that I bought and properly marinated in my stash for some little people in my life. The pattern is old, but basic. I didn't have enough fabric for a top, which is really what I wanted but after prewashing and shrinking! darn cotton! I had to go with pants. It maybe hard to tell in the picture on the pattern, but the pants looks short there. So I added two inches on each. Each of these pants is a different size, since I made them for different girls, one who loves loves loves a little doggie, so I think she will really like these pants! I already gave the pink ones to the recipient, no indications yet if its a hit or miss! The print has frogs and flowers! Really cute.


Posted and submitted and written by Bonny D 09/04/13
_____________________________________________
from Sallye!
I haven't done much personal sewing recently but I did make my grandkids beach bags made from screen mesh. The mesh was a freebie I picked up at a Clifton Park NG meeting (maybe two years ago?). Then as my grandson's 7th birthday was approaching this summer, and I know they like to go to the beach/pool, I knew just what to make....a mesh beach bag! (And, besides, I had the itch to try working with the screening.) But, of course, I didn't have the perfect companion fabric.
He loves soccer so it was a no brainer as to the fabric, and orange is one of his favorite colors, so he got orange straps. Since it was his birthday I filled the bag with a new beach towel, dive sticks and goggles. He seemed to be pretty happy and his mother thought the bag was awesome!
Of course I couldn't let his little sister not have one because she would probably want to borrow his. Since she is very girly and loves butterflies and anything pink/purple, I was happy to find the pink butterfly fabric at Joann's and the pink webbing at WalMart. Although the pictures don't show it the bottom is open mesh and not covered by the fabric. I think the next time I will put the seams on the inside, like normal.
Well it wasn't long until they actually used the bags when they went to the pool; once my granddaughter had put some pool things in it, she thought it was too heavy for her, she is only 3-1/2, so Mom got to carry it. After they returned home I got an almost immediate email request from their Mom for a bag of her own, and then her mother-in-law asked for one too. I have just enough of the freebie screening to make the two bags...lucky them! This time they picked out their own fabric.


 Sarah taught me things by saying them and also by not saying them. Say what? Yeah! She makes me a better sewer! She taught me to own my patterns! To cut the patterns like they are mine, I can cut off those pesky seam allowances of other sizes, I can retrace if necessary! Another thing she taught me is to not be afraid to do things just because it is supposed to be the "right" way of some other teachers right way. The one thing she taught me by not saying is let the fabric tell me what it wants to do, to let me know what to do. It is more than just the turn of the cloth allowance, it is the drape, it is the stretch, it is the weight, fabric and pattern has about a million variables that need to go into play, it is so hard to contemplate them all, so try to read the fabric. So I did, and when I did, I came up with this little collar with this little jacket after I had already sewn up the body of the jacket. See how I added the lapel? I did that all by myself! No pattern! I draped it on my duct tape dress form with a scrape piece of fabric, then made a pattern. Then I realized after a quick muslin, I didn't like how it sat, and added a piece more, that is that extra little triangle to the left on the top of the picture, that piece allows the collar to lay a bit more flat and relaxed. Because this jacket is eyelet (from Joanns, that I dyed with tea on the stove--my husband asked me several times what I was doing!) and was a test run and intended just a little light summer cover up, I didn't interface the facing or collar, this is why the picture isn't very good and it collapses. I think too, it may be a bit big in the bust. The non-functioning buttons are a gift from my friend Jean Gribi from Texas she makes them under the name Whim-Z. They are a beautiful addition to my jacket! She was making THOSE buttons when I called her about the retreat that we attended together! How neat that I could incorporate them on the jacket!


So I want to thank the member who was clearing her stash of the mesh screen as I was the lucky one that day. Now I just have to make the next two before Labor Day.
Sallye Romagna
Posted by Bonny D on August 8, 2013
____________________________________________
In June I went to a Sara Veblen Retreat, it was held at her home. Not cheap, but worth every dollar. There are near by hotels and restaurants and grocery stores (to pick up lunches). She is fantastic and starts our day with coffee or tea! and a bite of homemade something...she asks what we hope to accomplish while we are there. Sarah is very attentive and really makes you feel important and want you to have a good experience, wants you to learn what you want to learn. She will repeat something if needed, or in a different way. She is very accommodating. Someone told me that some ladies have been coming to Sarah for years, and I commented that I hope to know what I need to by then. But, it wasn't long after that I changed my mind on that comment. Because Sarah is so wonderful, that even if I knew everything she knew about sewing and pattern making (like that is possible!) I would still want to be around her! I truly believe there is so much to be learned from this expert.

Stopping my gushing....It was an open forum type where we worked on our own projects. Sarah provides a table for each student, and we can rent a machine if necessary. Downstairs is her studio where there are cutting tables and more work tables, and big mirrors where she does the fitting with excellent lighting.
I chose to bring pants from Burda (never yet worked on), a jacket pattern that I long labored over from McCalls 6294, and my jeans from Stern from last years conference in Houston. To work on in three days. Ambitious I know. I ran out of time to really dedicate to fixing the jean pattern, which really required making a new muslin to figure out if I made the necessary fixes. Which I didn't. I found out, when I made a new muslin, albeit in pink stretchy fabric...another story with another whole set of new fixes probably! However...you can read my post on the home front page about how I got that fixed up for hopefully sure. I have to make one more muslin before I cut into denim.

Below is the progression of my collar changes and my pattern work.
 Sarah taught me things by saying them and also by not saying them. Say what? Yeah! She makes me a better sewer! She taught me to own my patterns! To cut the patterns like they are mine, I can cut off those pesky seam allowances of other sizes, I can retrace if necessary! Another thing she taught me is to not be afraid to do things just because it is supposed to be the "right" way of some other teachers right way. The one thing she taught me by not saying is let the fabric tell me what it wants to do, to let me know what to do. It is more than just the turn of the cloth allowance, it is the drape, it is the stretch, it is the weight, fabric and pattern has about a million variables that need to go into play, it is so hard to contemplate them all, so try to read the fabric. So I did, and when I did, I came up with this little collar with this little jacket after I had already sewn up the body of the jacket. See how I added the lapel? I did that all by myself! No pattern! I draped it on my duct tape dress form with a scrape piece of fabric, then made a pattern. Then I realized after a quick muslin, I didn't like how it sat, and added a piece more, that is that extra little triangle to the left on the top of the picture, that piece allows the collar to lay a bit more flat and relaxed. Because this jacket is eyelet (from Joanns, that I dyed with tea on the stove--my husband asked me several times what I was doing!) and was a test run and intended just a little light summer cover up, I didn't interface the facing or collar, this is why the picture isn't very good and it collapses. I think too, it may be a bit big in the bust. The non-functioning buttons are a gift from my friend Jean Gribi from Texas she makes them under the name Whim-Z. They are a beautiful addition to my jacket! She was making THOSE buttons when I called her about the retreat that we attended together! How neat that I could incorporate them on the jacket!
I haven't made up the pants yet...stay tuned!
But I made some more jammy pants! The flannel plaid is $1 a yard from Walmart bought like 9 years ago! Don't judge me! The flannel bubbles is more like a year or two old from Joanns. I made up master TNT patterns for Jess and I, but I think I have to tweek them a bit. Jess said I made the leg too narrow, and I think on mine I could make them a bit higher on the hip/waist. I have been making mine with all elastic, and Jess's with elastic with drawstring, because I thought she liked it that way...but I think next time I will try to get a comfortable elastic measurement from her. That would be so much quicker. I added pockets this time, but they take a lot of effort. I read a post online about adding a pocket after the side seam are serged...I might have a go at that someday. Jess's next request is a plaid robe. Yes, you remember correctly I just made her a robe! I will be waiting for a sale! Ahh, she likes moms sewing! Yea me!

Posted by and written by Bonny D on August 8, 2013
___________
These are some of my new bags done with faux leather and vinyl. It is an interesting , frustrating learning experience working with these fabrics.
Ellen Younkins


Posted by Bonny D April 15, 2013
_______________________________________________________________________ Lucy Gee shared her photos from her Worchester Expo experience.
https://picasaweb.google.com/115894723038539019865/WorcesterExpo201302?authkey=Gv1sRgCKDGm6Oo16GNvwE&feat=email#
____________________________________________________________

fabric savvy choices where she could, she then appliqued the states down on the main fabric.
Kathy...you know how I like to grade my own work? Well I give you an APlus! I love that you saw something and without even a pattern you ran with it, and had to use a computer too! Extra bonus points for that! Hang your beautiful wall hanging with pride!


April 6, 2013 posted by Bonny D
______________________________________________________
Ann Schucker reviewed her beautiful garment on PatternReview see it here
http://sewing.patternreview.com/cgi-bin/readreview.pl?readreview=1&reviewnum=85100
Ann says:
Ann says:
It was a Cutting Line Design - Hearts A'Flutter overblouse. Fabric was a hemp/cotton blend in a grey with black, red, and white slubs. I used Shiva Paintsticks in Iridescent Red, Ivory Black, White and Pewter and a Cedar Canyon Rubbing plate to apply the embellishment.
Technique: First I took a line drawing of the garment and with color pencils, played with placement of the rubbings until I had a plan that pleased me. I laid out the pattern pieces on the fabric, traced around them roughly, leaving about 1" or so outside the cutline, and cut those out. I made sure to mark them well outside the cut lines so I could id them by number again! Then I applied the rubbings according to my plan. Let them sit 5 days to dry and then heat set the paintstiks in a well-ventilated room with by ironing. Then I pinned the pattern pieces back on and cut them out.
After I sewed the garment, I heat set again in the dryer, just to be safe. Then I laundered it with cool water as I normally would. That removed any lingering oil paint smell and softened the rubbing areas.


April 6, 2013 posted by Bonny D
______________________________________

Take for instance the photo below! I have made this one now three times. This one is for my college girl. By request! A stash busting project to boot! I intended some nice jammies with the dot fabric for myself purchased 6 or so months ago, the red was to be another robe, but alas I never buy enough! so it marinated. Let this be a lesson to me again! Robes take so much fabric because: news flash cotton shrinks! and then you can't fit the very long pattern pieces on like you wanna to save space. so just buy more than what you need. This is Simplicity 5877. The pockets I added, because I omitted the inseam ones. I also added the fun trim to the sleeve by removing the bottom few inches. Next time I will do it without the trims seam allowance being visible from the inside, so that when the cuff is rolled up it looks pretty. Stash busting indeed, so I rewarded myself and ordered from VogueFabricsStore.com 132-19 and -24 to make Burda 7125 View A that I have been eyeing for a while. This may seem like it goes against my non buying fabric policies, however! Since I used 5+ in the making of this robe, and the 2.5 in the dress, AND I have a actual project in mind for the fabric I purchased AND I have a personal deadline of April 30...I think its okay! Yea me! It's going to be so pretty!
 posted by Bonny D April 6, 2013
_________________________________________
Mug Rug Comforts A Friend
A good friend was hospitalized for many weeks this past fall. I had previously made a quilt for her, which she used everyday at home. She told me that she didn't want the quilt in the hospital with her because she was afraid that something would happen to it. I was trying to think of something special to take to her that would brighten her days and thought that a mug rug might be just the thing. Mug rugs are small and don't take up much room. Beverages can sit on them and a tray can be set on top of a mug rug without it getting in the way. She loved the little colorful pieced square of fabric, which she immediately put her coffee cup on at her bedside. Later I learned that she'd also used her mug rug to comfort herself during treatments and tests as she moved into the final days of her life.
Cathy Sentz
____________________________________________________________


The above is a little book bag made with love for a special young reader for Christmas. Shh, he hasn't received it yet...our little secret ok? I bought the fabric for a quilt but downsized the project considerably. This is how stash is grown.

This is by special request, a little pink cape. I made little cuffs with wrapping paper cores for strength wrapped with blue painters tape (what I found handy). I used velcro for all three closures. I hope she loves it. I have a little fabric left over, I may either make her a little simple A line dress or a tank for me! I really love the fabric its like a crushed velvet and it was from WALMART! Shh, she hasn't gotten this either, another secret ok?

Another special request this time from my daughter. I gave her some choices of fabric. This is a Sew News project I think Aug 09. I added the elastic across because the cds would fall on me as I drive with mine, but it causes a buckle even though it was a gentle stretch. I will do a little repair by moving the elastic that holds it to the visor, to the end, and that will keep it smooth. I didn't do a binding as that is fiddly work, I made the backing large enough to fold over and again to make pretty and stitched down.
Bonny DeCastro January 16, 2013
_____________________________________
Cheryl Pollock is an Albany Chapter member who just finished her Edwardian blouse pattern. Those of us who went to the President Conf Recap got a sneek peek at it. Check it out here!
Cheryls etsy store is called LadyCherStitchStudio
________________________________________


These are pics of children making fabric topped coasters and their creations at the church Christmas function. They did some different layering that I haven't tried before, it gave me some ideas!
Bonny D
January 4, 2012
____________________________________________________________
My First T Shirt Quilt by Ethel Duncan
A friend’s daughter was graduating from high school and I asked if her daughter would like to have her T shirts from all of her performances turned into a quilt. Thevery next day I was given 10 T shirts. They represented a treasured proof of all of the shows Kayla performed in over the past several years. The thought of cutting them up was a hurdle I was not looking forward to doing.
Never having made a T shirt quilt I needed information. The internet was helpful. Goggling T shirt quilt brought up several web sites that had useful information. One bit of information was the commercial cost of a finished T shirt quilt at $500 plus. One of the saleswomenat Joanne’s inAlbany guided me to use a woven iron on interfacing. This stabilized the knit fabric. Every T shirt was a different quality and weight.
Kayla’s favorite color is red. I found an interesting paisley print in Joanne’s. It had all the colors of the T shirt. Then I tried to find colors to go with the print. No luck. I just did not have the sophistication to come up with some good ideas. A visit to The Joyful Quilter was the next step on my journey. The sales person was a big help. She brought out several choices to choose from that went well with the paisley. I was also given advice on the batting. The backing recommendation was to buy a flannel sheet. I ordered one from LL Bean in a rich red.
The next hurdle was interfacing, and then cutting up the T shirts. The interfacing was easy and really changed the flimsy knits into stable fabric. Now the cutting was another thing altogether. Cutting is permanent. I really did not want to ruin her memories and all I could envision was a pile of strips that could no longer be worn especially if this project did not come to a good end. But once I got started it went well.
In the end I never used the paisley. The whole project took on a life of its own. I worked at it after work, before work and on week-ends. Joyce Caruso lent me her Janome 1600p. What a wonderful machine. The quilting was easy.
Kayla wanted her boyfriend in the quilt so with her Mom’s help I put together a throw pillow with a picture of the two of them at her graduation. The pillow turned out pretty cute.
This was a fun project. I would recommend it to anyone. You can be a beginner at sewing. Lots of help is available and it makes a great gift of memories.

Ethel Duncan
12/05/12
_______________________________________________
These four hat photos are submitted by Ellen Younkins, her new line. Yes, you may recognize her name, not only is she one of our wonderful members...but also we have seen her contribution in Threads Magazine! These hats are lovely, Ellen! Just in time for winter! 12/05/12 Bonny D.


 _____________________________________________
My haul from the October NYC bus trip! I have already sewn up something from the purple stretch cotton! You can see I bought some stretch fabrics from Metro Textiles. I really love that purple wavy fabric, looking to make a cardigan from it. Under it is the velvet, I don't know what that will be but it has to be fantastic! The denim is on the right, underneath the Coach lining. I have already washed and dried my denim 3 times! Ready to go! Some leather on the lower right.
My haul from the October NYC bus trip! I have already sewn up something from the purple stretch cotton! You can see I bought some stretch fabrics from Metro Textiles. I really love that purple wavy fabric, looking to make a cardigan from it. Under it is the velvet, I don't know what that will be but it has to be fantastic! The denim is on the right, underneath the Coach lining. I have already washed and dried my denim 3 times! Ready to go! Some leather on the lower right.

Photo with the two pairs are view F, they have a strip of fabric on the side leg. Super cute!
In the photo with the four pairs: the bottom and top pairs were made with Walmart stretch cotton. I probably spent less than 15 dollars including thread, elastic and pattern for all 4 pairs. Yea me!


One fine looking bag! I tried it out a weekend ago when I went to the Rhinebeck Fiber festival. It held 3 skeins of yarn, money, phone, and a bottle of NY wine without any trouble! I hope to make a matching duffle bag with the left over fabric.


________________________________________________
Little Dresses for Africa photos submitted by Cathy Sentz
I had been waiting for a better photo of all the girls at the orphanage. Katie, our contact at the Orphanage is back in the states. Katie reiterated that the clothing, dresses and britches, were really appreciated.
Editor note: see Albany Cares page for link on how to make these dresses


__________________________________________________________

Above is a photo of a backpack that I made for my grandson. His birthday is soon and he'll be receiving the pack with books inside. (Last year the three grandkids received pillow cases with books inside.) It is made from corduroy and lined with homespun. The pocket is made from homespun and cotton. The outside measurements are 14" x 16". Normally it would measure approx. 15" x 16" finished, but I was using up corduroy leftover from something else I made a long time ago. The homespun is left over from a quilt. I was surprised that I was having difficulty sewing the corduroy to the lining since it kept "creeping." I think the problem is due to the direction that the corduroy was cut crosswise according to the directions. Next time I'll use my walking foot for this step which should help. This "Sew You, Sew Fun Backpack" pattern by Marie Duncan may be found at http://www.husqvarnaviking.com/us/backpack.pdf .
_____________________________________
Anita Keeton shares the following:
The one of my husband is the shirt that I finally finished. It is a Colette pattern "Negroni". It's the first man's shirt I've ever done and even though I am sure there are many in the group that could have done a nicer job, I'm really pleased with how it turned out! Laurence even wore it to work and announced that I made it!
The doll was a pleasure to make.


Thank you Sallye for sharing the following:
Like many people I have been bitten by the "bead bug" and enjoy making jewelry for my family and friends...they make wonderful gifts that surely will not be duplicate gifts.
- My friend's sister lives in the San Diego area and near a place that sells Murano beads - very cheap. She visits every year and usually brings back some beads for me to play with, but this year she also brought back some very pretty orange beads for a necklace for her and some simple purple beads with a hint of gold in them that her sister picked out with the request that I make two bracelets - one for her and one for her daughter. I don't know, and don't care, if the beads are "seconds" because they are still very pretty.


- When my sister - who has about everything she needs - turned 70 we had a big party for her. I didn't know what to give her so I made a black evening bag (she's a very social person and has many parties to attend) and earrings and necklace to match. She loved them and certainly she didn't get a duplicate of them. That's what we love about making things ourselves.


_______________________________________________________________________
Below are some pics of McCalls 6282. See my review on PatternReview.com under my name Legal.Dealer. I wore this dress to a baby shower and a bridal shower! I really love wearing what I make, it is so satisfying you know? Sorry for the tree growing out of my head! My photographer needs lessons!


This picture below is the same McCalls 6282 in a top. I made this up using 2 dollar a yard knit fabric I found at my Wilton Walmart! I made this as a muslin to try out the pattern alterations I needed for the bust area. I am not so happy with the end result with the pattern on the knit going in an unflattering direction, however it was necessary because the stretch was only one way. I may still wear it out.

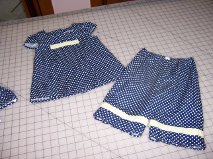
Below is McCalls 6017 in views C and F. I intended to cut the shorts a little longer, but forgot while cutting and ended up using the bodice fabric along the bottom edge. I used the pink polka dot as a patch pocket too on the back, I called it "watermelon shaped pockets" I got such a kick when the birthday girl was talking to somebody about the pockets and said "watermelon pockets"! I hope her mom will send me a picture while the birthday girl wears it! In that same picture on the top right corner you can see the fabric I bought at Osgoods all those years ago. I am almost ready to make a jacket out of it, but I didn't buy enough so I have to really think about it and do some strategic layouts to use it. Otherwise, wouldn't it make a fabulous skirt? Or a bag?

Below is an apron I made a while ago and gave as part of a bridal shower gift for a friend. She loved that it was handmade. I put my little signature tag on the front of it "Hilos Bonita", as in 'Bonnys Threads'.

______________________________________________________________

_____________________________________________________________

These are the Easter outfits I made for my granddaughters, Laurina and Julia, this year. They are 100% cotton, and trimmed with grosgrain ribbon and yellow and white daisy trim which I sewed on using invisible thread. The pattern is New Look 6958.
I wish I had some photos of the girls wearing the dresses. They looked very cute!
Mary Dwileski
___________________________________________
The picture below it Simplicity 1806, a pullover top made with cotton lawn. I bought it from Fashion Fabrics Club for four bucks. I wanted something quick and easy, and since I didn't particularly like this print and color, I used it as a muslin for a pattern I hadn't used before. DOH! I bought the wrong size pattern so I used the smallest my came in a 16, and tried to grade down the back pattern piece. I used french seams on the front and serged the side seams. I made a forward shoulder adjustment by eyeballing it while it was pinned on my shoulder. The armhole hangs open low showing my undergarments so I will need to either not care *or* wear a tank top under it. I used half a package of very narrow bias tape for the neckline and armholes. The top came out large and looks like I didn't make it for me. The neckline is modest! I did my second PatternReview.com review today on it.


Here is a sample of what I have been sewing lately. These are two of the four quilts I made recently. They all have the same basic pattern that I adapted from a Lesisure Arts book "3 times the charm!" This design is on the cover! I have been in a white in a quilt type of mood lately and bought some white at Joanns. It was on sale and super wide, double I'd say what it usually is, so it was a great buy. I have some of it left and did a prewash on a little piece because I'd like to make a top and use it as underlining...now I need a pattern!
I had 2 quilts professionally long arm quilted by KC Framing and Fabrics and 2 quilts done by Patti's Quilting and Fabrics. The quality and choices of each shop is very similar. The only difference of quality to note is that KC did not offer to change the color of the bobbin thread, while Patti's made a point to help me pick out bobbin thread colors that would compliment the backing. I think too it is important to note that I did my first drop off at KC and being the first time I had longarm quilting service, I didn't know any better even to ask for different bobbin thread! The cost was one notable difference in the two shops. All four quilts were approximately the same 38x42 size, under the 2 square yard minimum for each shop. I was charged $56 per quilt at KC and $41 per quilt at Patti's before tax on a longarm basic pattern for each. No frills nothing fancy, and no binding service requested. That month KC was having a special food drive with a discount on longarm services. Without that discount I would have paid $80 per quilt. A cost difference I may be inclined to pay again if I needed the quilts fast! Since I was able to pick up the two quilts within 2
weeks, Patti's took about 5 weeks.


Ahh, this is my new little toy. I bought it from Ebay for $9.99. It fits on my old Singer FM 22, I haven't tried to put it on my Janome, but the Buttonholer has a standard clamp for attaching. I took it for a test run and does make some nice looking buttonholes. It has templates that you can put in the unit for different sizes and shapes of the buttonhole. Quite nifty, I look forward to trying it out on a real garment. I am making a shirt and hope to use it for that as its first project. I will post a picture when completed!
If you look to buy one of these, do a little research. There are two basic types, straight shank and slanted shank. This green case is for the straight and from what I read was made for USA customers. There are others in cardboard boxes made for customers in Europe. Not sure of those colors. Also, make sure you get some templates in your box or buy them separately.


This cute little mouse Anita made for our Sagers event! There were several little mouses scattering around the tables. That is one mouse no one minded being near our food!

I made this dress for the Sagers event, I liked how it turned out. It is McCalls 6163, I made mine without the collar, and used a nude color knit for a lining but applied it like an interlining because I couldn't figure out how to line this unlined mock wrap front raglan sleeve dress! I wore it again at my friends first Communion. I got lots of compliments! Even from Peggy! You can read my very first Patternreview.com review on this dress, I am know as Legal.Dealer there. I remembered about a week after the story behind the fabric: I bought some at Joanns, then used it to make a blouse for someone else! I didn't want to use it because I am selfish and really wanted to make myself a blouse with it...but I was rewarded! Because after I made that blouse I found this fabric at Joann's again on red clearance! Yea me!

This little bag I made for my little Godchild, who needed a fancy ballet slipper bag. She loved it! At first I attached the tulle with a zillion more gathers, but it would need its own seat in the car to transport it! So I toned it down, anyone need purple tulle? See me! I used quilting cotton for the outside and straps, and added some fancy trim to the straps. I attached it with steam a seam tape, looks like it is holding up when I saw it last week. I used some polyester charmeuse for the lining and matching ribbon on the middle. I used some simple tote pattern as my guide for sizing but mostly winged it cause I had my own vision. Thanks for reading! love ya, Bonny

_______________________________________________
The following from Sallye Romagna
I have been nudged by friends to post pics to the blog of the items I have recently been busy sewing. So here we go!
My daughter bought a house last summer and it came with two built in benches (one in the basement and the other in her bedroom dressing area) and she immediately asked me to make cushions and pillows for both, as well as a new table runner for her dining room table. She said she just couldn't find a table runner (rerady made) that she liked or had the right color combinations for their house. So off we went to fabric shop. All the fabric came from Joann's which we purchased last October. I have checked at Joann's for the green/cream printed fabrics and have been unable to find them and they are not listed on the Joann's website. The red fabric was still available when I last checked.
The basement bench was almost 9 feet long and only 16 inches deep. For that bench I made three cushions and 6 pillows. (I still have to make 4 more cushions which will go on her sofa to tie the room together.) Each cushion is almost 3 feet long and I used 3" foam, wrapped in batting. Since she has children I put a zipper in each cushion so she can remove and clean the covers. I felt this was a necessity since the green printed cushions are part of the children's "art area". (We tried using Scotchguard but during the testing we noticed green on our rag and did not continue the process.) Hence the art hanging on the wall above the cushions. I also made the piping that is on all the cushions and pillows with a contrasting fabric. All fabric for these cushions was cotton based and washable.

The red cushion is in her bedroom dressing area. This fabric came also from Joann's and includes a zipper in the back, covering 3" foam wrapped in batting. I was relieved of the task of making the piping for this cushion as we used the ready made twisted braid piping. whew! So far she has not wanted any extra pillows for this window seat. She may change her mind once she starts using that place as a reading nook (if she can find any "free" time.) Under that cushion is a lid that opens to a storage area. At her request, the cushion was made to not fit too snug so she could easily open the lid (they use the area for a dirty laundry hamper.)

On March 28 I drove to Maryland with a car full of Nina (that's what the grandkids call me) fabricated home decor beauties! We had a fun visit, the weather was very nice, got to see both daughters and their new homes, visited with my girlfriends in Maryland and spent time playing outdoors with the kids. Everyone was very happy at their house - the kids have a cushy place to sit or lie on; and Mom and Dad's dressing area is complete!
Sallye Romagna
______________________________________
New sewn items by Bonny DeCastro
This is a little pouch that a person can attach to their key chain or make it their keychain. It has a little batting on both sides and back. It was designed to be a EarBud pouch, to hold those little earphones for mp3 players. It is super cute. Found it on SewMamaSew.com November 19, 2011 Passion For Technology. I gave a couple out and put some Hersey Kisses inside.

A little top for a sweet little girl. Please forgive me I don't have the pattern info handy.

Lindsay made hers with scrapbook paper, I made mine with Walmart fat quarter fabrics. Now, don't be hard on me thinking this is not a sewing project! I used my cutting board and rulers, and rotary cutter.
It is a great project for a sweet thoughtful gift. I could see doing a fancy paper pieced square and using
that inplace of the plain squared fabric. That is interesting! Hmm, may need to explore that thought.

YOU ARE WANTED HERE! WITH YOUR PICTURES! CONTACT BonnyKDe@hotmail.com
Tissue holders are a quick and stash busting project. You can find several tutorials and patterns for free on the web.

I made this embroidered suede like bag for Mom's birthday. (Some of you may remember her from the picnic!) She picked out the fabric and lining and pattern at one of our Joann trips. She left it behind when she went to Florida...I guess she was asking me to make it! Gladly! I made a little bill holder and small item bag to match.


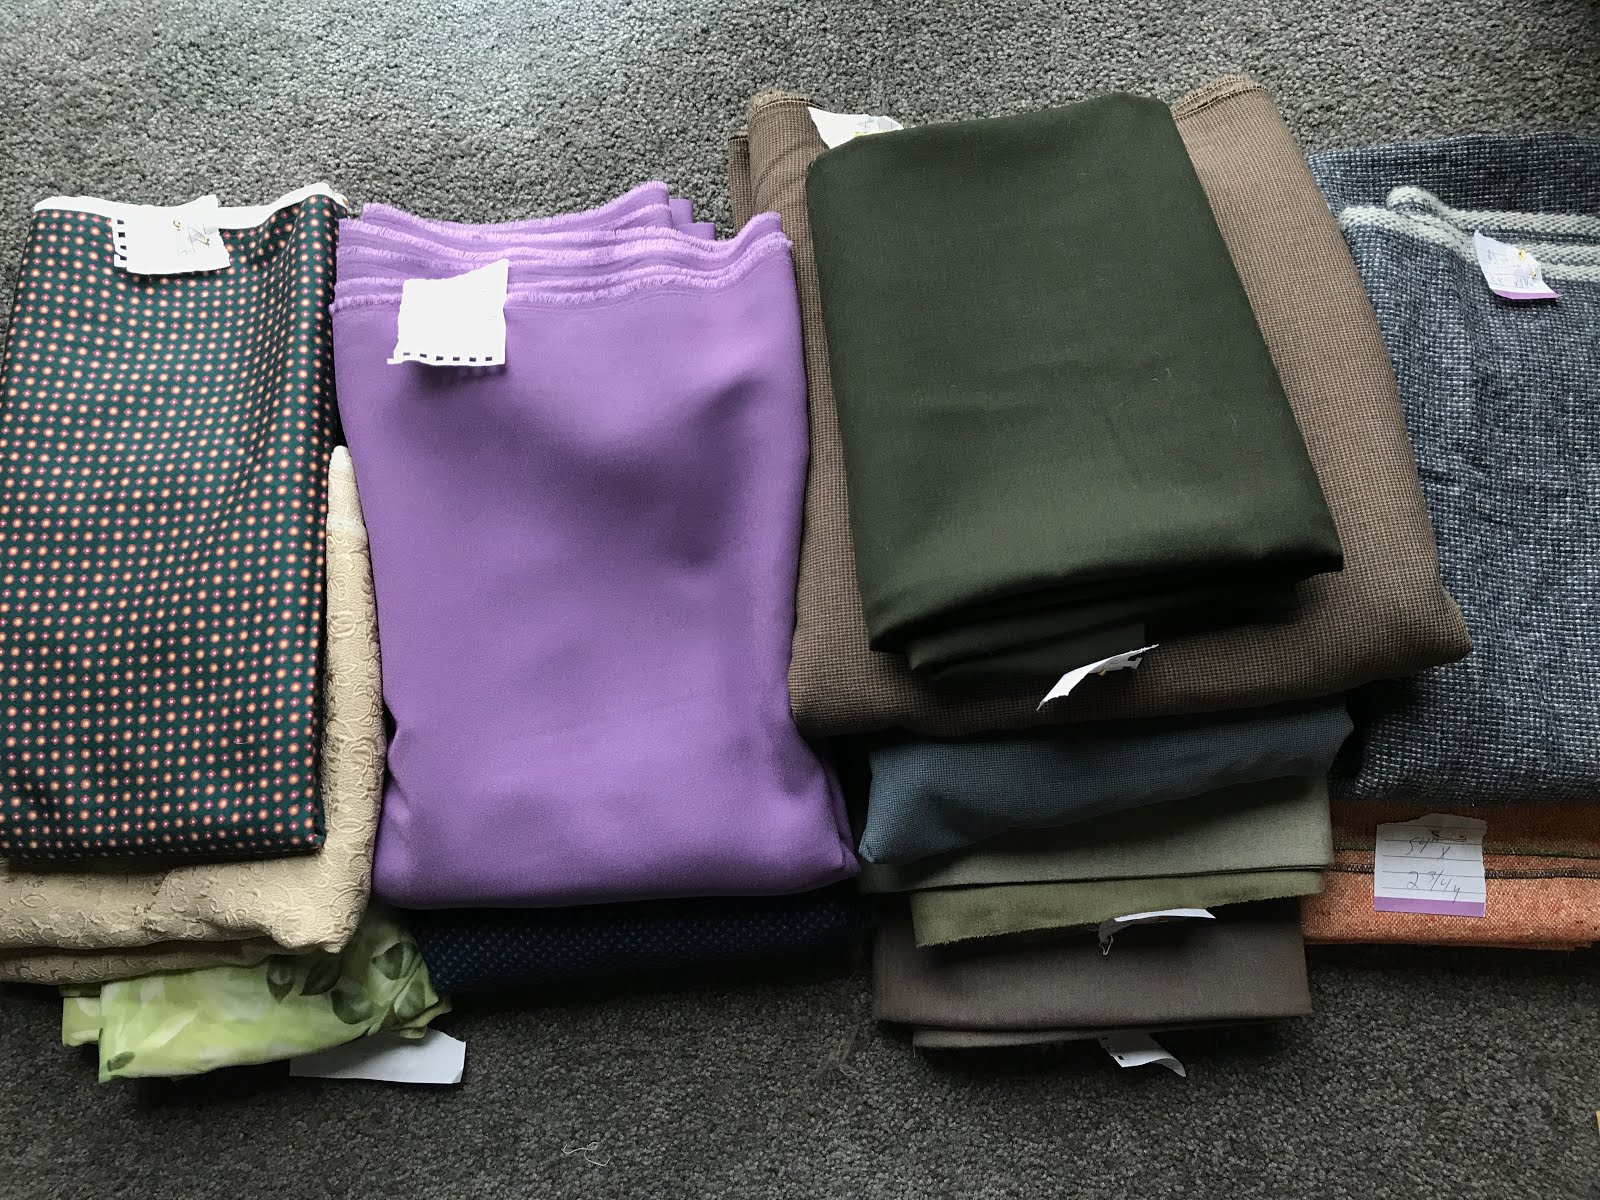
A little day trip with member Anita using the Megabus to NYC brought me home several solid china silks, a lovely pant material (I forget the contents...maybe wool blend), a little piece of leather, a silk printed charmeuse from MOOD, the blue flower material is for a bathing suit I might make someday, and lots of trim.

The following is showing two sides of a reversible table runner I made. I followed along for a project in the little book 3 Times the Charm, using charm fabrics from a gift and my Benartex charm subscription.


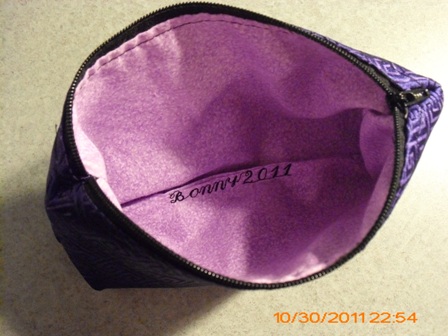
This is a little pouch for my purse, I personalized it! The outside fabric is silk that I bought in Albuquerque at Conf. The inside is cotton from my stash.
This Ikea chair was recovered a while ago and finally made the pillows to match. The blue flower fabric you see is from recovered outdoor cushions I did even a LONGER while ago. I keep my stuff eh? Fabric is the 45 or so inch home dec from Joanns. Have you noticed the price went up on that stuff? :(

More pillows, couldn't resist these prints. I used zippers and (previously purchased on sale) pillow forms on all of the square pillows. I had nice matching zips! Thanks to my collection.
PS: Alfreds on Central Ave in Albany has zips a bit discounted from normal retailers in the area.
A little gift for my member friend Kathy. The inside is like oilcloth. I bought...you guessed it on sale! from an online site. At 60 inches wide you get a lot for your money. I will be able to make several makeup bags with it.

A little bag with the oilcloth on the inside, silk on the outside, and a little cream gift for a friends birthday coming up.

The next two pictures are of tap pants. I found the information at http://blog.craftzine.com/archive/2011/07/how-to_make_a_custom_pair_of_t.html. Using this site I was able to draw up my own pattern to fit ME. I highly recommend it. I used super cheap $2.47 a yard costume charmeuse from Wilton's Walmart to try out the pattern. Eventually I would like to use silk to make some pretty ones. However, I am in love with the gold color and the teal lace trim. When I was cutting out the waist elastic I forgot to reduce the amount from my measurement and the red ones fell right off! I reduced it for the gold ones, but still not quite tight enough.


Next up is a pair of culottes. I obtained this pattern from the Lingerie Sew Along blog I belong to. I have wanting to try it for a long time. This is the second pair I made. It sure is pretty, but not comfortable for me- too small even if it is stretch lace.

Next up is "Blue Disco" a shirt I made from fabric I got on sale online. It has a bathing suit type of feel to it and has little tiny cirles of plastic or something that reflects light. Reused pattern New Look 6807. Tell me is it too flashy for church?

Finally I have New Look 6871. I modified it by adding lace and poly organza to the front yoke. I used a cotton slub knit from Fabric.com. I love how it turned out, but think I could have left off the interfacing. The back top yoke sits away from my back, so the next version I will have to try to fix that. Check it out here, because you probably wont see it on me till next summer! Looks a little crooked eh? Perhaps it is my posture or because I was fussing with the back.


I hope you have enjoyed viewing my latest creations. I hope this will inspire you to submit entries of your own! Please share your sewing with your fellow members.
Thanks for reading,
Bonny DeCastro
Subscribe to:
Posts (Atom)