
My son had asked for a pair of pants for Christmas using an old set of pants that he liked and that actual fit. This pair was about 15 years old and unfortunately the store where we purchased them is closed. We had tried many stores to buy new pants but most were dudes as they were not able to accommodate the width of his thighs. Even shops that you think would carry American Men physique clothes such as Carhartt, Dicks, or REI fell short. So with seam ripper in hand, pattern paper in the wings and selected fabric, the creating began. Due to the fact that the previous pair were zip offs and contained a gusset in the crotch area, some redesigning was required to make just a straight pair of pants. The gusset was kept but I extended it down (tapering as I went) the entire length of the leg. My son chose gray camouflage knit fabric which helped in not having to match patterns but I decided to serge the fabric edges just to be neat. For the most part the pants went together fairly well. I had purchased some snaps for the front of the pants but couldn't figure out how to attach them until I realized I did not have the correct tool to do so. The ones purchased had to be hammered in place, so a purchase of $7.00 for that tool was all that I needed. He is happy with the pants and has plenty of room to move.


Needless to say he wants more!
I was asked to expand on my repair of a priestly garment that appeared in the ASG Notions a few months back. I have included the text submitted as well as more photos explaining or detailing my process.
"I was asked by our priest to reattach a clasp to a cope. However, when I received the garment all the
wefts had disappeared in the area where the clasp was to go, and the
surrounding material had little to no strength to secure the clasp. Having the advantage of a textile conservator
in the family (my daughter- Kayla Silvia Winokurzew) she presented me with two
options for repair – recreating the weave by inserting new wefts or putting
nylon netting (tuille) over the area and stitching around the area to give it
more strength. As this condition existed
in the upper front portion of both sides of the garment and around the neckline
area, I opted for the tuille and placed a self-constructed 1” bias tape to cover
the tuille, so that the wearer would not be irritated by the slight roughness
of the tuille. The completion of this
task involved a lot of hand sewing as there was no way that I was going to open
the garment at the many seams that existed due to the fringe and other
embellishments that adorned the garment.
As it was, I had to open the entire neckline and a good 6” on the front
to attach the tuille and the bias tape. Additional interfacing was also sown into the
cope under the lining where the clasps were to be attached as there was
previously only one thin layer of muslin. The garment itself weighed a good 20 pounds so
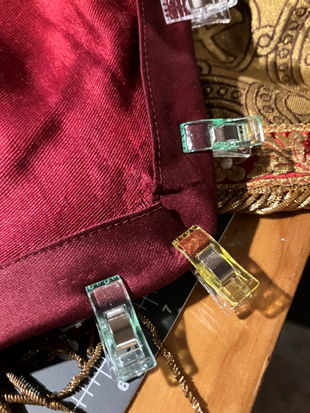
there was a lot of weight being carried by the two clasps. While working on the garment, I used a lot of
clips to ensure that the multiple layers of fabric stayed in place and was
grateful for the #10 needles obtained from taking Helen Haughey’s Couture Hand
Stitching Virtual class last year.
Although the final result may not be museum quality restoration, I am
extremely happy with the outcome, and hope that the garment will last another
50 years for use in future religious services.
I considered this project both a challenge for technique and color
compatibility, (oils from years of use had darkened the fabric around the front
and neck from its original true red) as well as an opportunity to visibly mend
a garment and further textile sustainability."
Other things to note, finding a compatible fabric was difficult, few exist that have do not have religious symbols such as crosses or paisley prints. A complimentary color was also had to find. The fabric chosen was a jacquard with a little bit of spandex, which was a benefit because I was using it on the neckline and on the front of the garment.
I hope this satisfies interested parties. This did take a lot of hand sewing and lots of time to complete.


 The tuille in place. The tuille is folded over about 3 times, so that the bias tape will have something of strength to hold on to.
 The bias tape being positioned for attachment both on the underside of the lining and on the outside of the lining. NOTE: the additional tuille on the underside of the really frayed area.

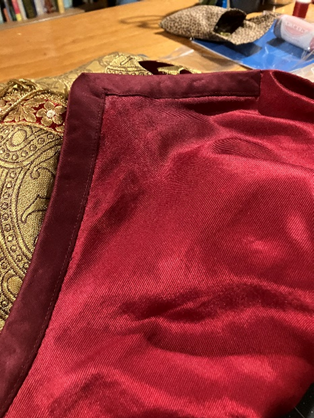 The finished inside of the garment with the binding attached
and the original label re-secured using misty fuse.
The finished inside of the garment with the binding attached
and the original label re-secured using misty fuse. The finished outside of the garment with the binding visible and the clasp in place.


